Tutorial
Add Database Monitoring
SuperMap iManager supports to add Database monitoring, please follow the steps below:
- Log in SuperMap iManager, click Database Monitoring on the left navigation bar.
- Click Add Database Monitoring on the top left connor of the page.
-
Fill in the following information according to the different types of database:
-
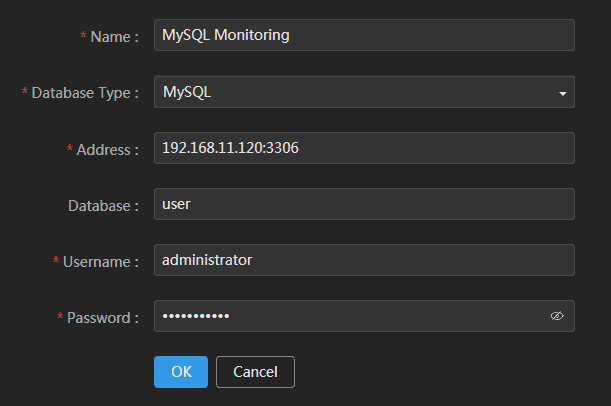
MySQL
- Name(Required): Customize the name of database monitoring.
- Database Type(Required): MySQL.
- Address(Required): The address of MySQL, the format is
{ip}:{port}, for example, 192.168.11.120:3306. - Database: The name of database in MySQL.
- Username(Required): The username of accessible account.
- Password(Required): The password of accessible account.
Notes:
If you are not using administrator account of MySQL database, please execute the following command in the database:grant replication client,process on *.* to "supermap"; grant select on performance_schema.* to "supermap"; flush privileges; -
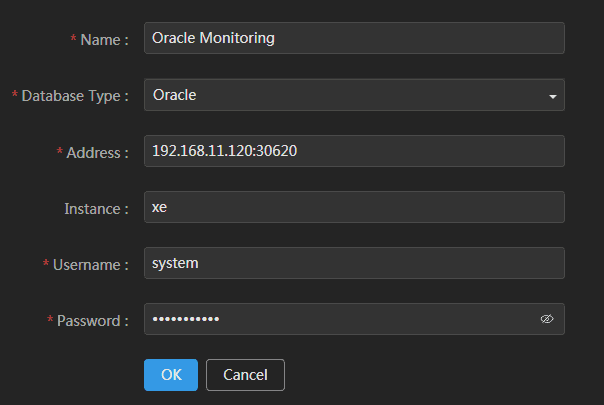
Oracle
- Name(Required): Customize the name of database monitoring.
- Database Type(Required): Oracle.
- Address(Required): The address of Oracle, the format is
{ip}:{port}, for example, 192.168.11.120:30620. - Instance: The name of instance in Oracle. A database instance is a set of memory structures that manage database files.
- Username(Required): The username of accessible account.
- Password(Required): The password of accessible account.
-
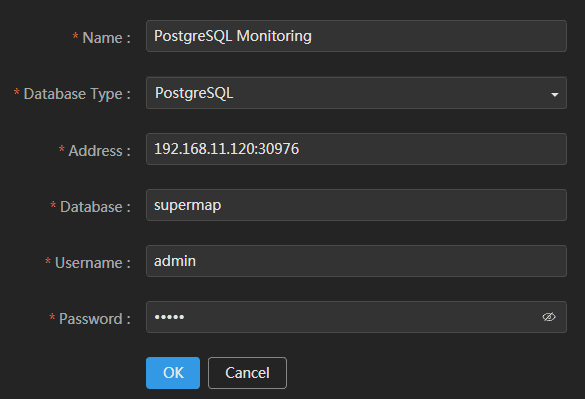
PostgreSQL
- Name(Required): Customize the name of database monitoring.
- Database Type(Required): PostgreSQL.
- Address(Required): The address of PostgreSQL, the format is
{ip}:{port}, for example, 192.168.11.120:30976. - Database: The name of database in PostgreSQL.
- Username(Required): The username of accessible account.
- Password(Required): The password of accessible account.
-
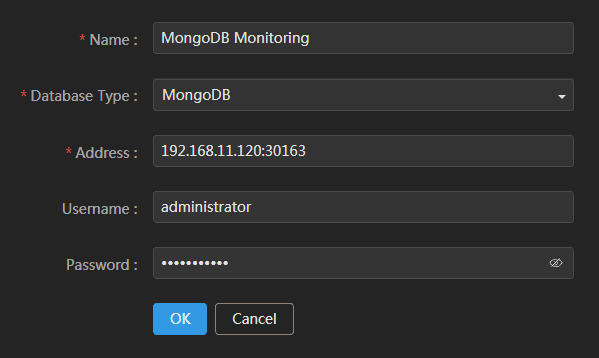
MongoDB
- Name(Required): Customize the name of database monitoring.
- Database Type(Required): MongoDB.
- Address(Required): The address of MongoDB, the format is
{ip}:{port}, for example, 192.168.11.120:30163. - Database: The name of database in PostgreSQL.
- Username: The username of accessible account.
- Password: The password of accessible account.
-
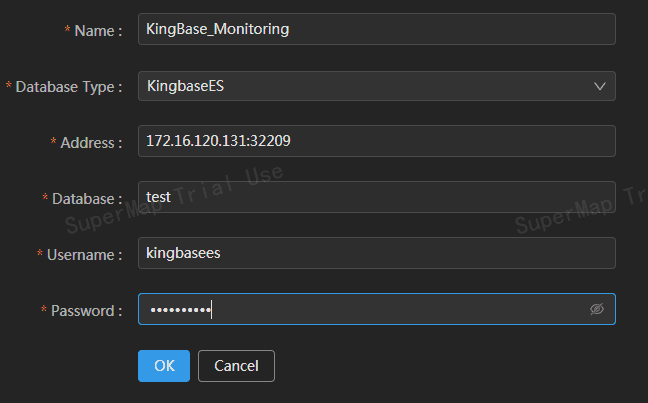
KingbaseES
- Name(Required):Customize the name of database monitoring.
- Database Type(Required):KingbaseES.
- Address(Required):The address of KingbaseES, the format is
{ip}:{port}, for example, 172.16.112.145:32209. - Database(Required):The name of database in KingbaseES.
- Username(Required):The username of accessible account.
- Password(Required):The password of accessible account.
-
- Click on OK to finish adding the URL Monitoring.
